

You know how in Filipino kitchens when we don’t know what to have for ulam, our knee-jerk reaction is to gisa? It’s so easy and so adaptable to a lot of ingredients.
Our dream at Starter Sisters is to make fermentation another go-to technique in your kitchen, much like gisa.
When that happens, you’ll find yourself with healthy fermented foods and drinks that keep well on hand. (Mabi always has pandan soda starter for fermented drinks, Karla keeps sauerkraut and burong lemon, and Mabel is never without several containers of kimchi in her fridge.)
Perhaps you’ll even create a convenient fermentation routine so that you have nutrient-rich dishes on the side or as main at each meal.
Here are lessons we have collected and practiced over the years to help ensure a safe and successful fermentation habit. There’s a lot to say about each one, and these largely focus on plant-based fermentation, but we have distilled them here for your quick reference. We’ll post more about them as we progress with our ferments.
In the meantime, we organized the lessons we have learned into three categories: Ingredients, Procedure, and Exploration.
Ingredients
1. Use fresh, high-quality ingredients. To have a successful fermentation, we want to make sure that the microorganisms will have quality food to feed on. If your ingredient is already past its prime, there’s a good chance that there’s already spoilage microorganisms in it that can make it hard for the beneficial lactic acid bacteria to take over. We like using organic fruits and vegetables in our ferments because it means they already have a lot of the natural microorganisms we need and no toxic chemicals.

2. Look for non-iodized salt or salt with no additives. Make sure that the salt you will use is just plain natural salt–no additives, no anti-caking agents, no iodine. These interfere with the microbial activity in fermentation and can affect the color or texture, even taste, of your ferment. Sounds easy, but here in the Philippines, a lot of the available salt in the market is iodized salt. Iodine is anti-bacterial, so it will actually prevent the bacterial activity we need. We’re always on the lookout for good salt suppliers and when we find them, we support them.
3. Use filtered/non-chlorinated water. Fermenting in the city, what we have access to is tap water and distilled water. When using tap water, we like to either boil it or leave a pitcher of it on the counter to remove the chlorine, then use a home filtration set-up. Distilled water means it comes purified, without chlorine and fluoride, but also minerals. You can visit your neighborhood distilled water supplier to ask them about their process. Both kinds of water have worked for us.
Procedures
1. Use enough salt. The correct amount of salt lets lactic acid bacteria thrive, and kills any pathogenic bacteria and prevents them from taking over. It also helps retain the crunch in your vegetable ferments and prevents mushiness. But do not oversalt either–this prevents even the good bacteria from surviving. And it will be too salty for consumption.

Generally speaking, the proper amount of salt is 2% of the total weight of your ingredients. For example, 500 grams of vegetables (weight after everything is chopped) needs 10 grams of salt. It helps to have a kitchen scale if you plan on fermenting regularly. If you don’t have one, remember that a level tablespoon is usually 15 grams and a level teaspoon is usually 5 grams. You can add your salt incrementally and taste as you go along, but saltiness can be very subjective.
2. Sanitize properly. For a successful fermentation at home, make sure all your tools and surfaces are sanitary to prevent contamination. While there are different methods for sanitizing, including the use of commercial sanitizers, we find the use of boiling water the most convenient and accessible for home-fermentation.
- If you’re fermenting a large batch or a number of items: just fill a large pot with water, place your jars and lids (not plastic!), and let boil for 5 minutes. Turn off heat, remove the jars carefully, and let air dry on top of a piece of fresh clean kitchen towel.
- If you’re fermenting just enough for one jar: boil some water and fill the jar with it and let it stand for 5 minutes. Boil some water for the lid as well. Carefully drain out the water and let it air dry.
- And in a pinch, I use 80-proof vodka (100 proof is better) or sake. I fill up a spray bottle with it, spray the insides of the jar and lid with it and let it air dry.
Should you really sanitize everything? Yes. It’s literally as simple as boiling water. Sanitizing means you protect your ferments from contamination.
Remember that it takes a while for jars to air dry so I do this 30 minutes to an hour before I do my fermentation.
And do not forget your work surface like your kitchen counter! This is very important. We tend to place grocery bags, our mobile phones, wallets, keys, and lots of random items on it, which carry a lot of bacteria.
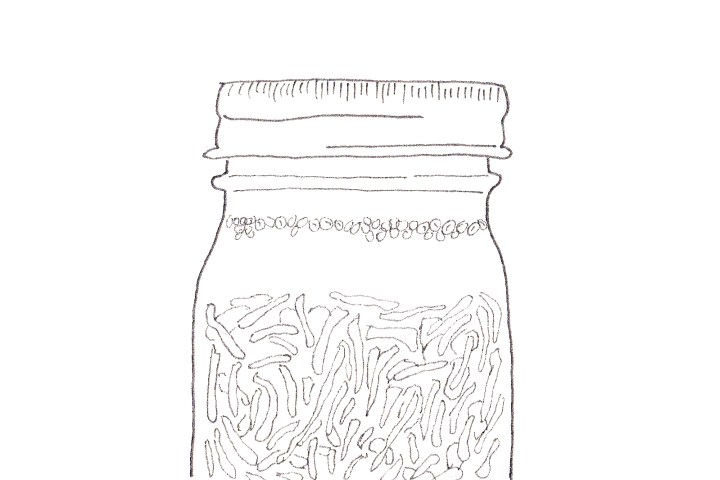
3. Keep out the oxygen. Lacto-fermentation requires an anaerobic environment. We are able to do this easily by keeping everything submerged in brine, which technically works as our airlock. Keeping oxygen out is not as hard to pull off but easily overlooked, which can affect the quality of your ferment. With clean hands, press down your ferments inside the jar, let the brine rise, layer a piece of cabbage on top, add your fermentation weight, and seal with a lid.
We usually use vegetable cores or bottoms to weigh down the ferment. You can also use a sacrificial fruit or vegetable (I have used whole kamote and veggie butts), brand-new garden marbles or aquarium pebbles. Just make sure to boil the marbles or pebbles in water for half an hour to kill any bacteria.
We like to use wide-mouthed Mason/Ball jars. We can place small bottles, dishes, cups, or ramekins inside wide-mouthed jars easily.
4. Have enough headroom. Do not fill your fermentation jar to the brim. You need some for your fermentation weight, plus your ferment will produce a lot of gas and even release more brine during its fermentation. Having an inch of headroom avoids spilling that precious brine or having insufficient space for the glass buildup.
5. Burp daily. We love doing this. We love the popping sound when we release the lid as gas builds up in the early days of our ferments. Whether soft or loud, that burping sound means your ferment is working.
IMPORTANT: Not all jars are created equal. Because of the gas build-up it is essential to use sturdy containers that are made for food. We like using Mason/Ball jars or tubs with airtight lids. Do not use/reuse decorative jars or bottles made of low-quality/thin glass because the glass can break (or even explode) from the pressure buildup. Avoid using plastic containers because the highly acidic environment of your ferments will promote leaching of plastic chemicals into your food, which we do not want.
Exploration
1. Play with time and temperature. There is no exact number of days when ferments get “done.” While fermentation needs adequate time to develop the required acidic environment, this can take anywhere from a few days to several weeks. Time depends a lot on the temperature of your environment. This is why making sauerkraut in the northern hemisphere can take three weeks and I have one ready and to my liking in five days.
What we consider “done” also has to do with our taste, e.g., the level of sourness or depth of flavor that you like. This means being attentive to how your ferment is doing and checking it daily for a minute or two. Taste if needed (and always use a clean spoon to prevent contamination).
This also means that time and temperature are “levers” you can play with. For example, sourdough, prior to baking, is kept in the refrigerator to retard or slow down fermentation overnight to several days to let it develop complex flavors. Remember that the longer the ferment, the less it tastes like the original. If you want lactic sourness while retaining some of the flavor or sweetness of the fruit or vegetable, pick a warm spot to speed up its enzymatic processes.
Generally speaking, too warm is not good. Pick a spot in your kitchen where the temperature does not exceed 35℃ and is relatively stable.
2. Ask yourself: Can I ferment this? The answer, usually, is yes. When we got into the groove of fermenting, we never looked at fruits and vegetables (and beans and seeds) the same way again.
In Starter Sisters we will regularly share with you different fermentation recipes and techniques that you can adapt so that you will feel confident to create your own ferments with what you have on hand. We’ll also share recipes for dishes to help improve your consumption of fermented food and they don’t sit in your fridge forever. You can also follow us [on social media] so that you are updated as we will be continuously testing recipes.
Celebrate fermentation in the Philippines and don’t miss out on updates! Follow us on Instagram and Facebook.
10 thoughts on “How to have a successful home ferment”